← Prev Next →
B75

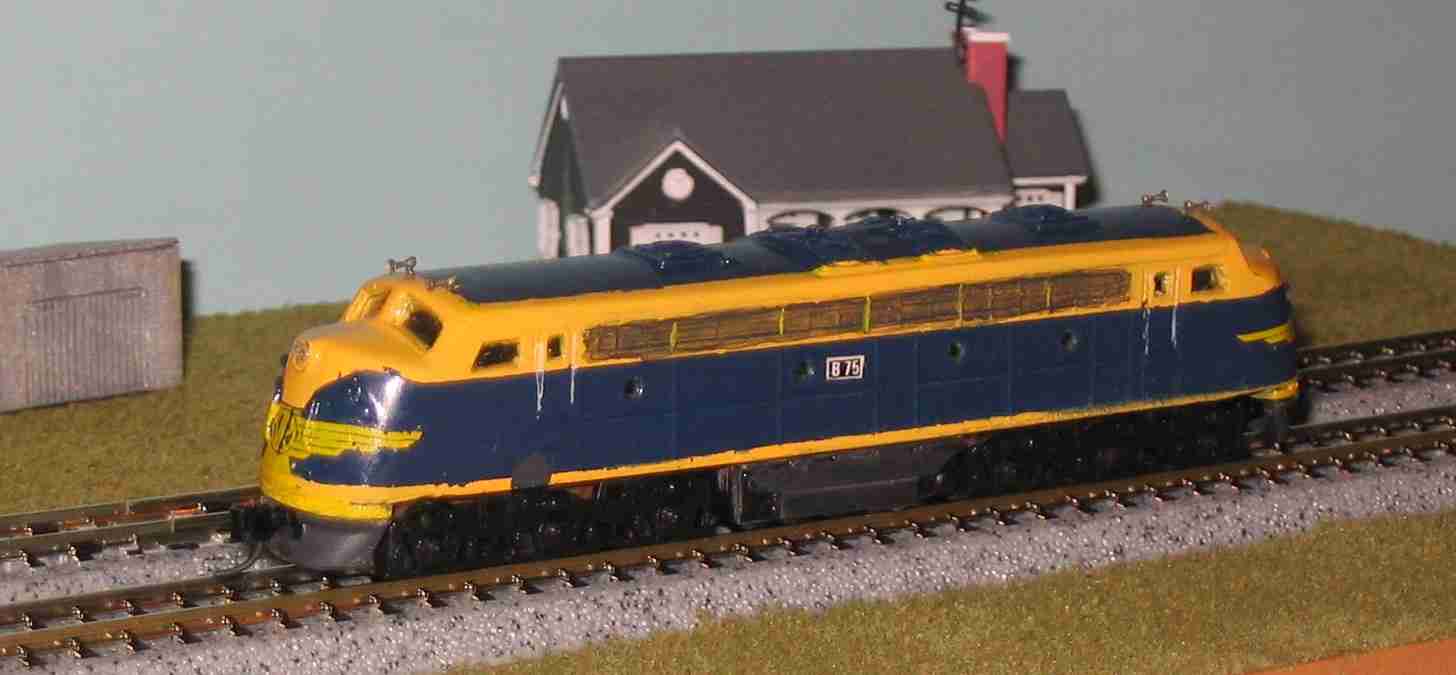
B class Locomotives were introduced into Victoria in the 1950s with many still running today, though a bit like great grandpa's old axe, still the original but with the handle replaced three times and the head replaced twice. First appearing in VR Blue and Gold, later in V/Line orange and grey and, in recent times, bloody anything.

B75 still remains in VR blue and gold livery, though in a rather sad state waiting for a rebirth as a heritage loco.

This model is made from a urethane kit as described below. Late in August 2009, a forthcoming RTR B Class loco was announced, to be sold through Aust-N-Rail. See the pre-orders section of the Aust-N-Rail website for details. I'm not getting any commission for this, but if you're thinking of a B Class, then take a good look at those, they are very impressive.

Model construction notes:

Components

Body Pete Boorman’s Workshop makes B class polyurethane bodies (try Pallas Hobbies). It's a one piece moulded body, with extra pieces for the pilots.
Decals VR and V/Line decals are available from Bills Billboards.
Mechanism Lifelike SD7s are most commonly used. These aren’t the best mechs on the market but quite adequate, excellent value and relatively easy to adapt. You’ll have to order one from America or keep an eye on E-bay. Cost - $35-50 or thereabouts, depending where you get them.
Couplers Microtrains 1015

Assembly guide

Instructions come with the kit. This note is intended as an overview so you know what you’re getting yourself into.

Admire the SD7 for a moment. The detail in the handrails, windows, horns, artwork. OK, that's enough, it's just an American loco, now rip the exquisitely detailed shell off and throw it in the bin.
We have no further use for it, unless you want to use it to practice weathering skills before weathering a real loco. It sounds and perhaps is scary the first time, if you worry about breaking something. If you can watch some one do it, you’ll see how easy it really is. Don’t worry too much about damaging the body – it's becoming trash anyway.

The Pete Boorman kit comes with a main body piece, pilots to be glued each end and fuel tank valences for each side, if wanted. The pilots are molded to include mount points for the chassis, though the chassis will still need a couple of mm trimmed at each end to fit.

Unsolder the motor terminal that is attached directly to the chassis base. The motor can now be removed from its mounting. You can then remove the screw holding the fuel tank. Trim the fuel tank width to 14mm with hacksaw or grinder. Solder a small wire between the freed terminal and where it was attached to the chassis. Replace the motor but rotated sideways (which is why you needed the extra piece of wire). The Australian bodies, particularly the bulldogs, are not tall enough for the motor to remain in its original orientation.

Mount the couplers. These can be glued or use a Microtrains 1059 Tap and Drill kit so the couplers can be screwed in place.

Converting to DCC
Use a decoder such as Digitrax DZ125 which is a small decoder with wires hanging out. Remember with DCC, all electrical feed to the motor. lights and any other accessory must come from the decoder. Fitting is quite simple. Remove the wires running from the chassis pickup to the motor, connect separate wires from the decoder to the chassis pickup and to the motor terminals. Run extra wires to headlights if you have them. The instructions tell you which colour wires go where. The only real concern is that you may have to leave off the weight at one end of the loco so you can sit the decoder in its place. This means the loco is getting a bit underweight and may have traction problems with a significant load or gradient.