Adapting Life-Like and Atlas SD7s
| Life-Like SD7s were very commonly used as donor locomotives for Australian models being relatively inexpensive, an acceptable wheel base and faily adaptable to fit a variety of locomotives. In recent years, Atlas SD7s are being used more often. The Atlas model certainly runs better but is more expensive. Other donor models are used where they are a better match for the Australian model, e.g. Atlas VO1000s are used in series 1 T class locomotives. Shown below is a brief guide to what to expect to adapt Life-Like and Atlas SD7s. Other locomotives may require a little more surgery on the donor model, perhaps involving trimming the donor chassis. Some need no alteration. | |
Life-Like SD7 |
Atlas SD7 |
Starting with ... | |
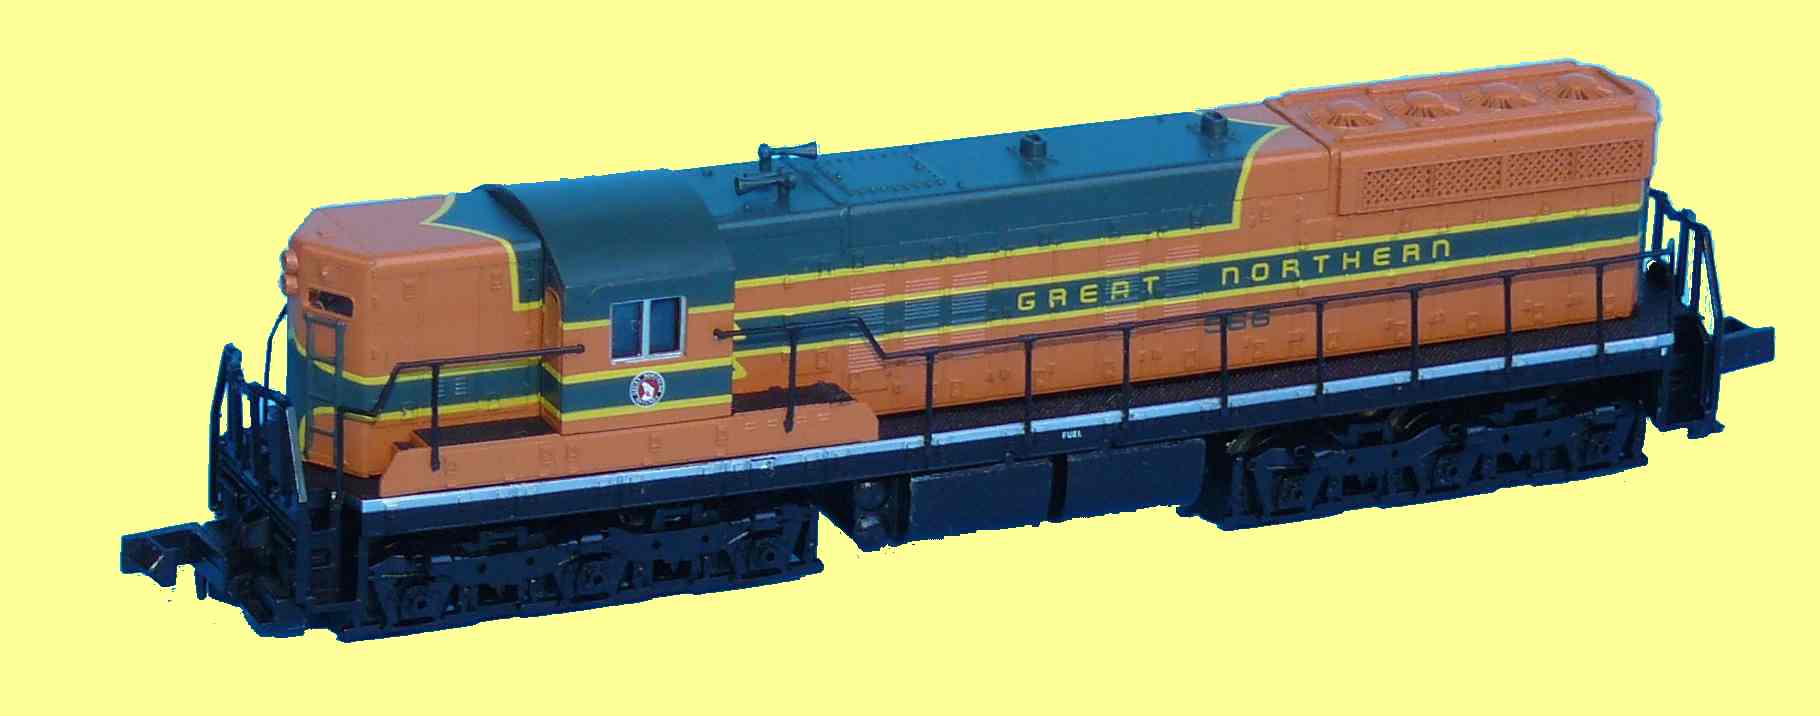 A Life-Like SD7 in Great Northen livery. Cost approx $40-50, depending on where you get it and the health of the $AUD. Shown here is adapting a Life-Like SD7 for use in Australian protype such as B and S Class models.
 |
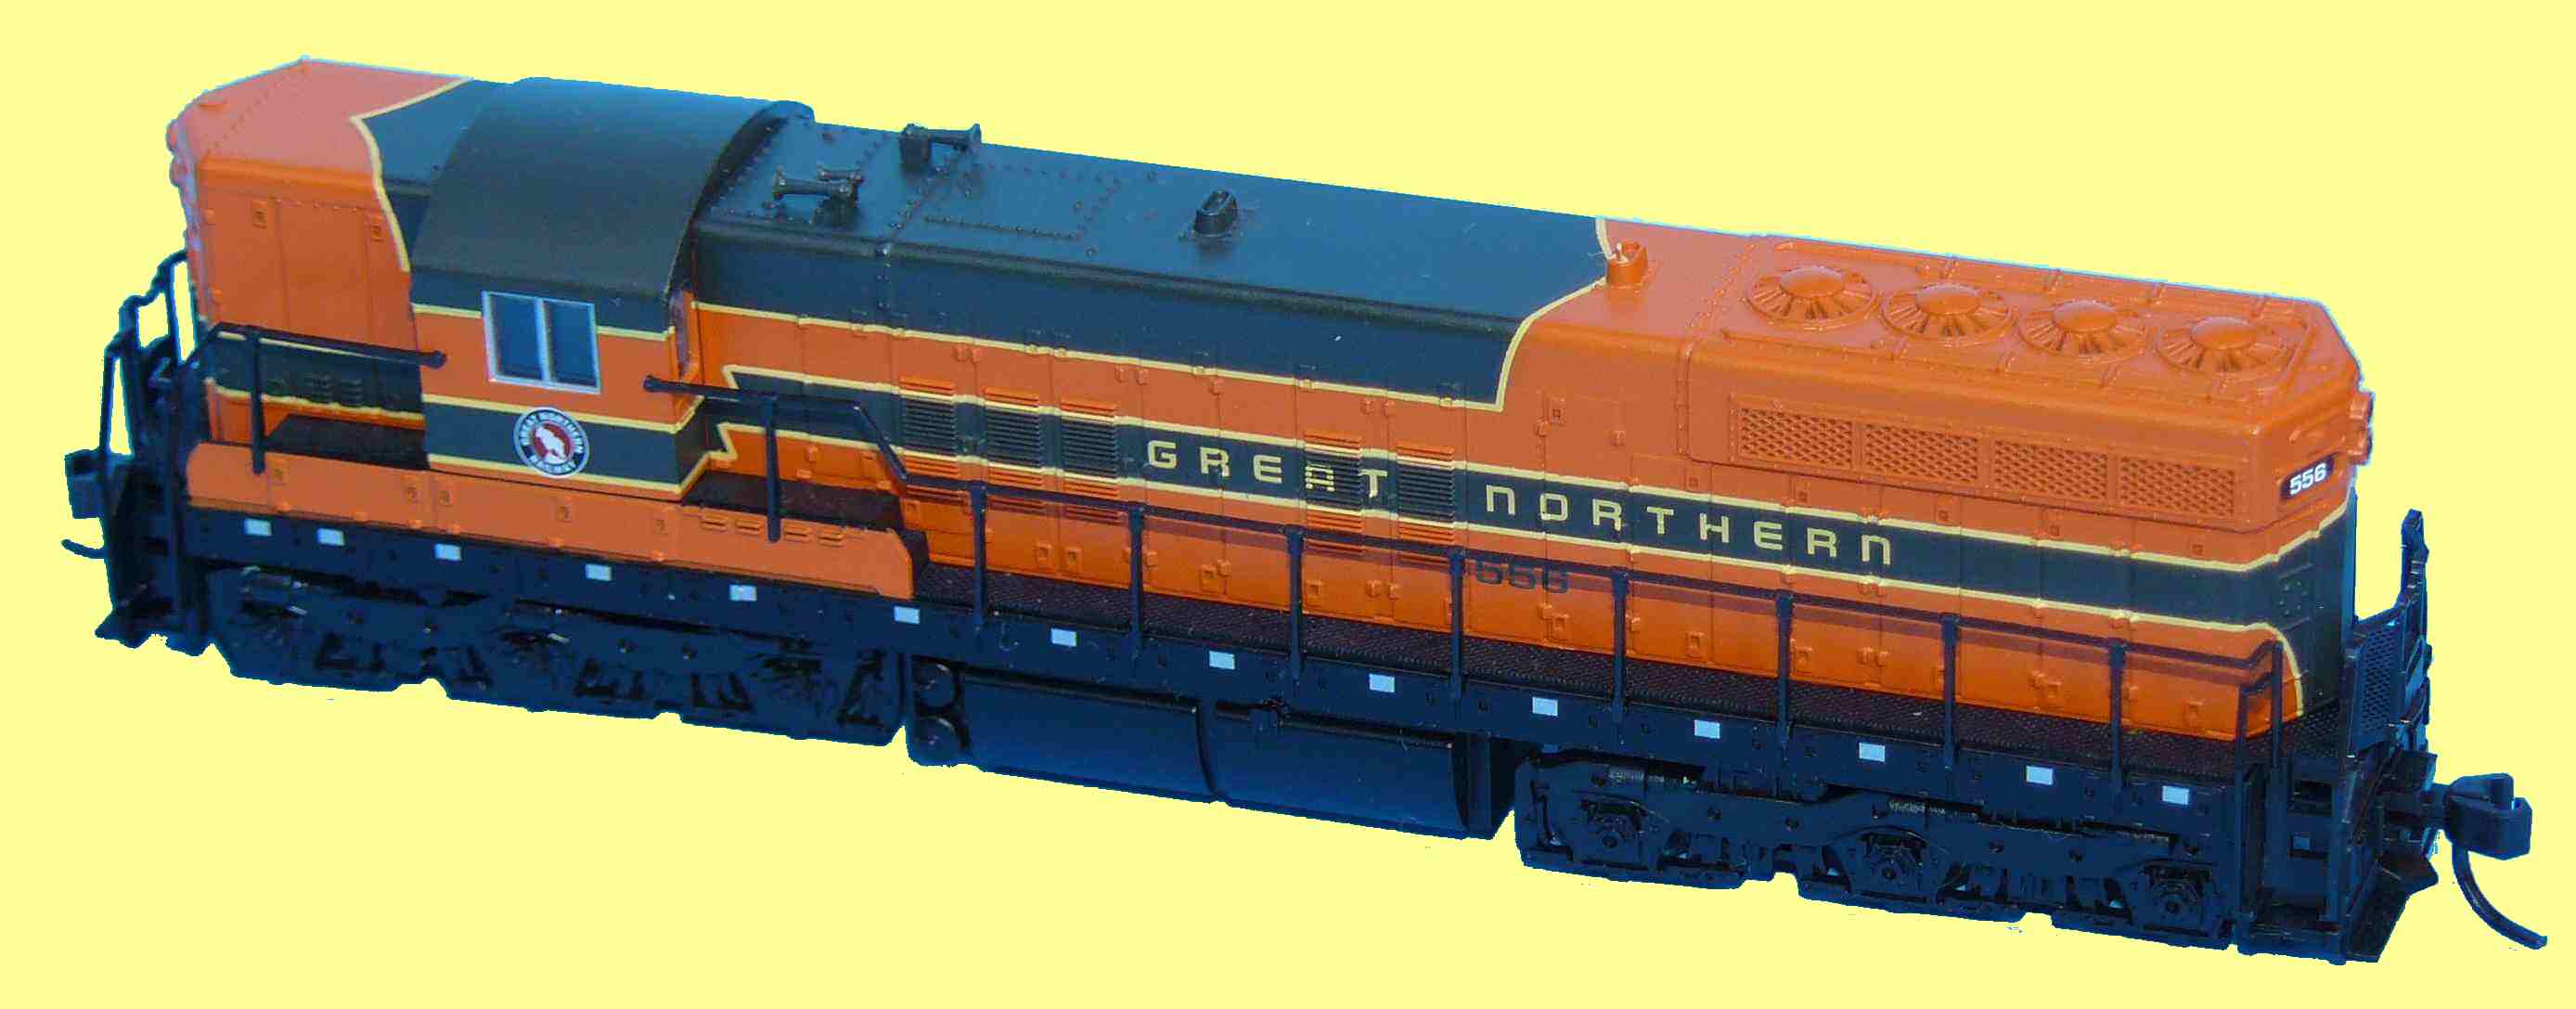 An Altas SD7, also in Great Northen livery. Cost approx $120. Shown here is adapting an Atlas SD7 for use in a Victorian G Class model. They are used in several other Australian models.
 |
Under the covers ... | |
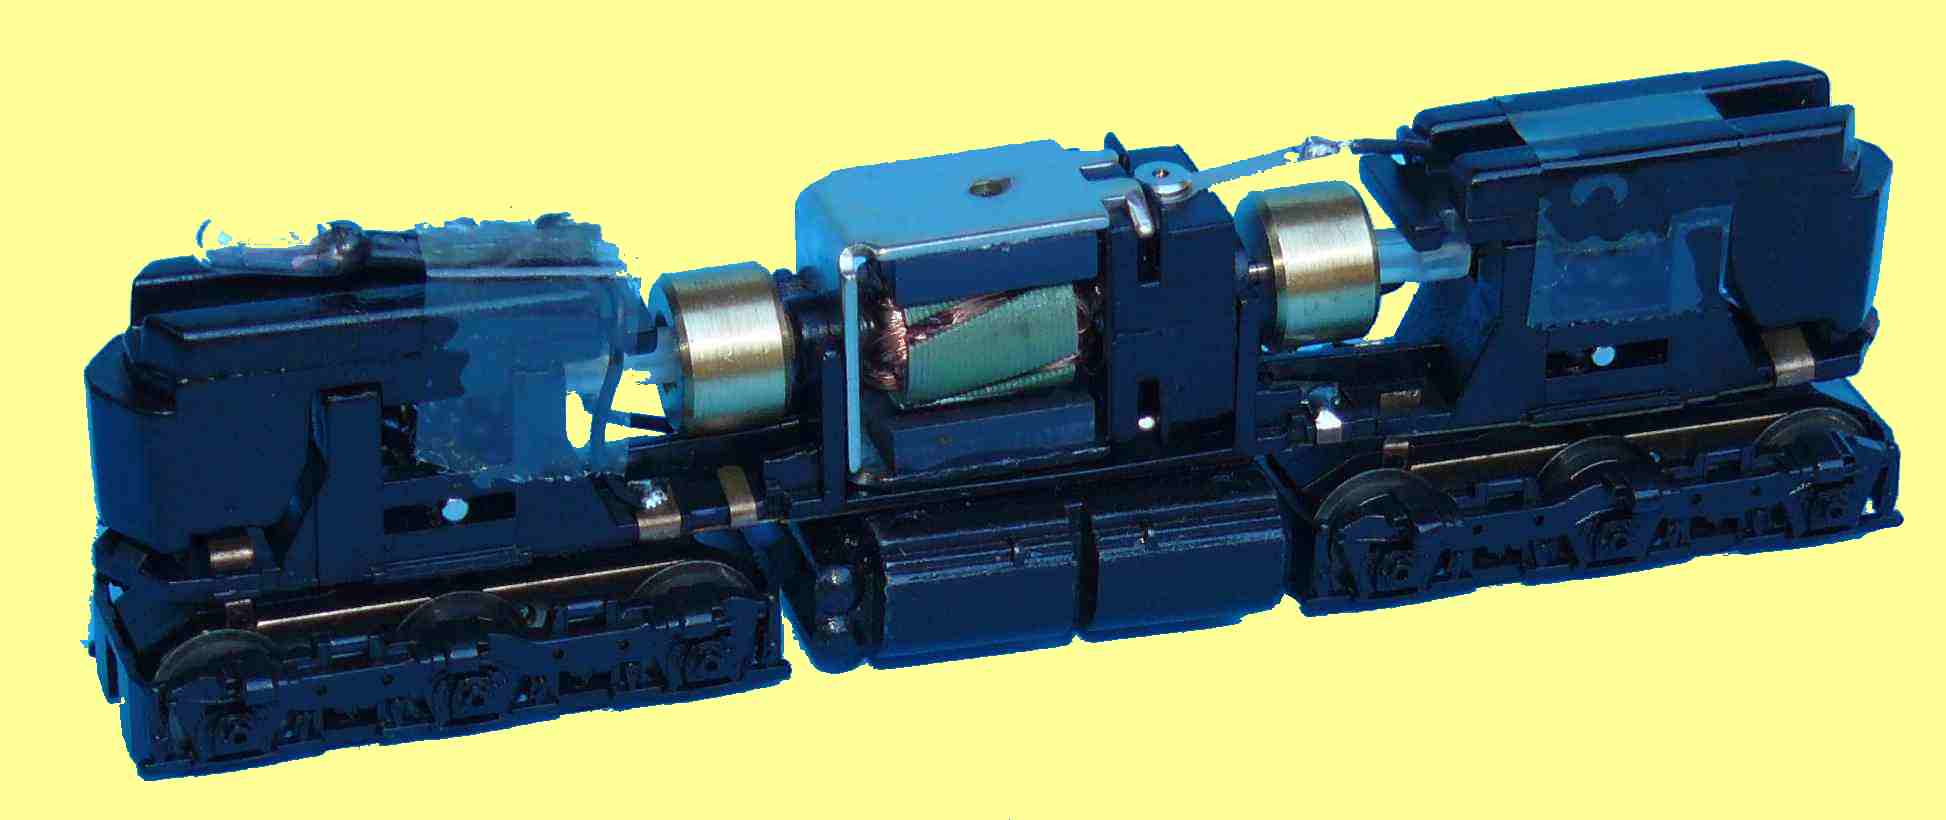 The body shell removed revealing the internals. Note the wire connected to the motor at the top. There is a similar connection at bottom. The underframe is mostly plastic with a couple of brass connectors running most of the length on either side throuugh which all electrical connectivity is made.
 |
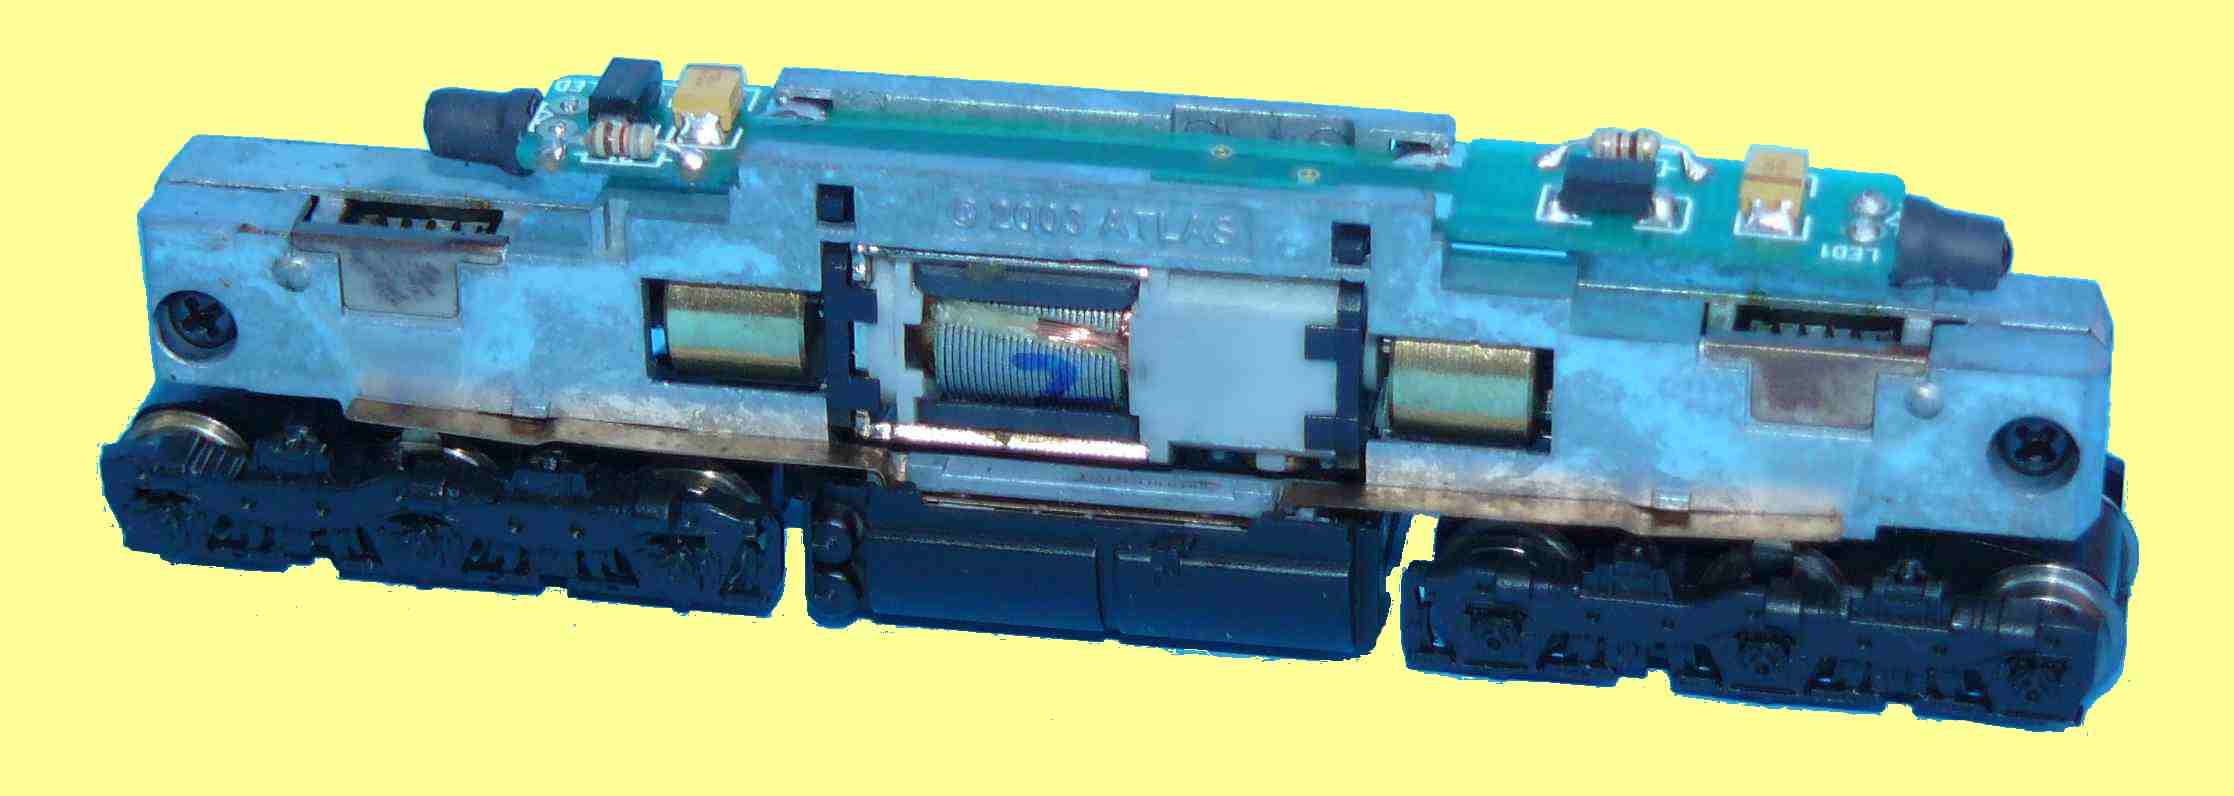 The body shell removed revealing the internals. This is the split chassis style. The two metal halves, split vertically lengthwise down the middle, are electrically insulated from each other. Electrical pickup from the wheels is fed to that half of the chassis. You can see the circuit board at the top. This receives power from the chassis sides and feeds out to the LED headlights and to the motor. There is no electical connection between the chassis sides and the motor, other than through the circuit board..
 |
Some simple alterations ... | |
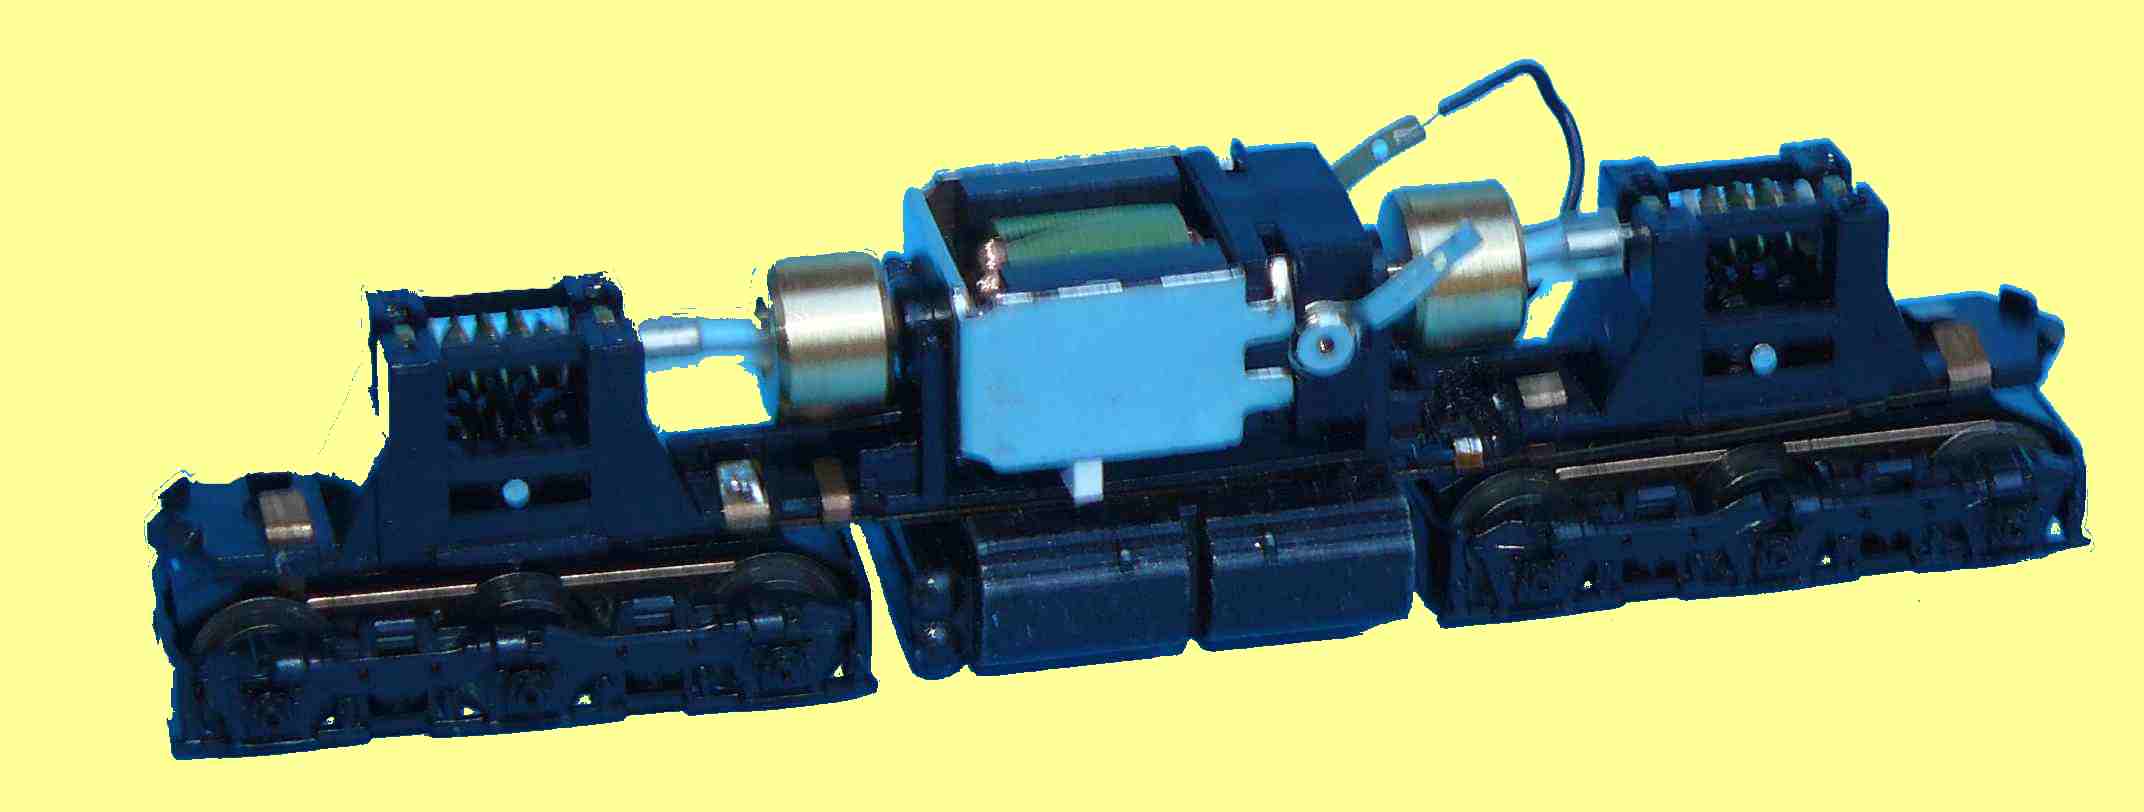 The motor must be turned sideways to fit the lower profile Australian models. The bottom motor connection is unsoldered from it's connection to the underframe. Connections can now be seen front and back rather than top and bottom. A short piece of wire needs to be inserted to restore the electrical connection to the underframe. It is quite simple at this point to put a DCC decoder such as a Digitrax 125 between the underfame connections and the motor. This picture has the weights at each end removed. These just sit in place. Models with bulldog noses (B and S class) will need the weights trimmed with a hacksaw or angle grinder to fit into the nose. Depending on which batch the model comes from, with the motor now sideways, it may sit too low in the mounting brackets resulting in the plastic tube drive shaft bending substantially. You see the end of a strip of styrene I've put between the motor and the underframe to hold it slightly higher and to hold the motor steady in its mount.
Optional enhancements at this point are to fit a DCC decoder (Digitrax 125 or similar), or hardwire the electrical pickup to improve loco running. I haven't tried this but will give it a go soon. For more details on these, check these links for Andre Kritzinger's tips on
fitting a DCC decoder and
improving pickup for Lifelike SD7s.
 |
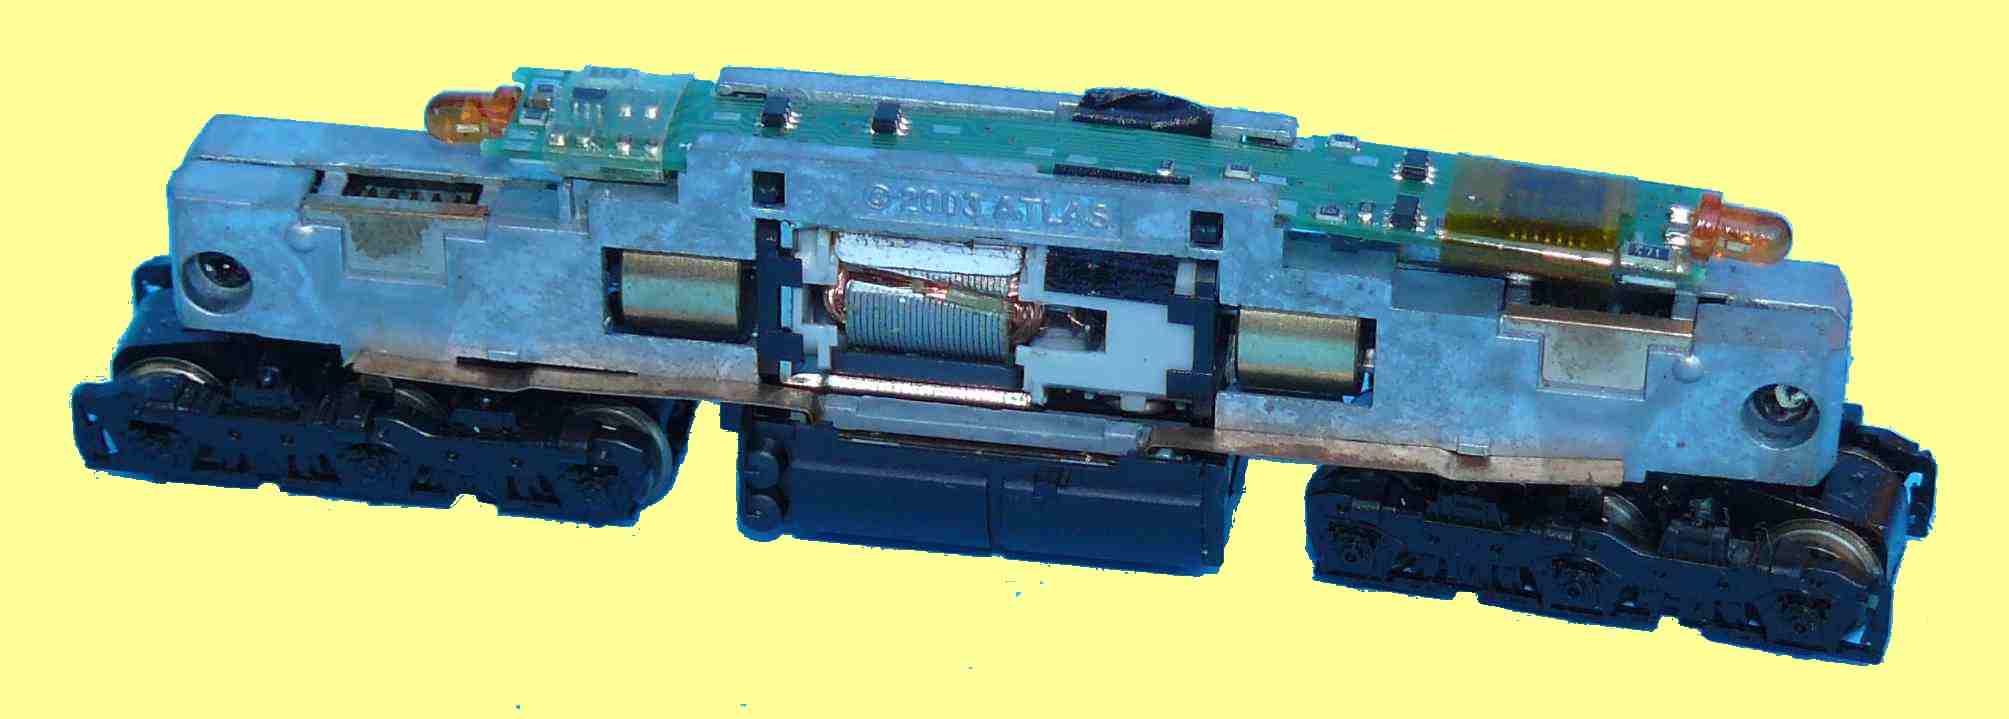 You can simply drop this mech straight into the G class shell - it is designed specifically for this mech so it is a snug fit. If you wish, you may consider the alterations shown here, replacing the circuit board with one that includes a DCC decoder and turning the bogies 180 degrees to give a slightly longer wheel base, more accurate for the G class, but not required for B or S Class. When reversing the bogies, the long end of the gear tower (now the fuel tank end) at the top of the bogie needs to be chamfered to allow the bogie to pivot freely. A sharp knife does the trick. Look at the G/BL kit instructions at
SAR N Scale Detailers for more info on this. If this sounds too hard, just leave the bogies as they are and perhaps think about it again in a year or two.
 Both these alterations involve loosening or separating the chasis halves. I've had some hassles with poor electrical contact to the DCC circuit board. Apparently this is more common with the slightly thinner Digitrax circuit boards so a different brand of decoder board, such as TCS, might be a better option. |
The finished product ... | |
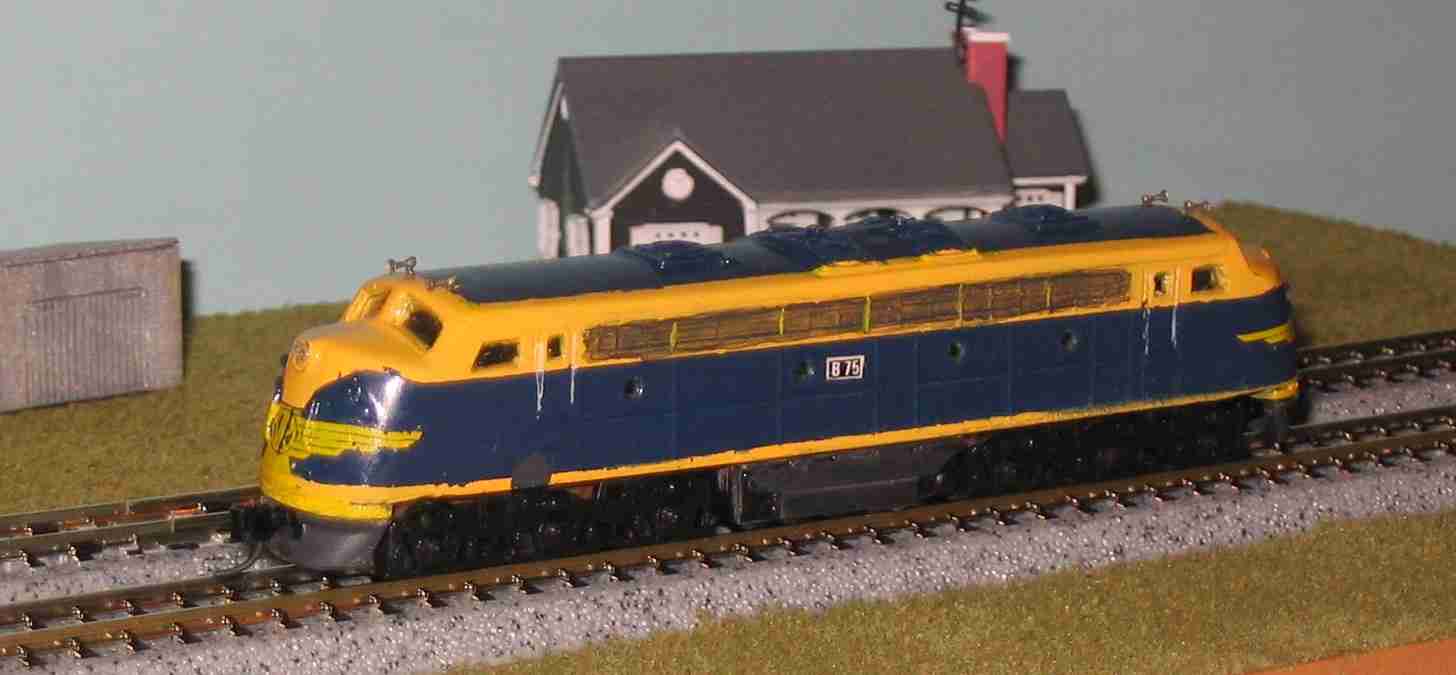 A B class loco in VR livery, powered by a Life-Like SD7. A B class loco in VR livery, powered by a Life-Like SD7. |
 A DCC enabled G512 in V/Line livery, powered by an Atlas SD7. A DCC enabled G512 in V/Line livery, powered by an Atlas SD7. |
I have heard that Life-Like is now making SD7s with a split chassis style mechanism, similar to the Atlas SD7. I have not yet seen any of these so cannot comment on adapting those for Australian prototype.